Repotting Clinic - Ludisia Discolor
See also: Repotting Cattleya and Repotting Phalaenopsis
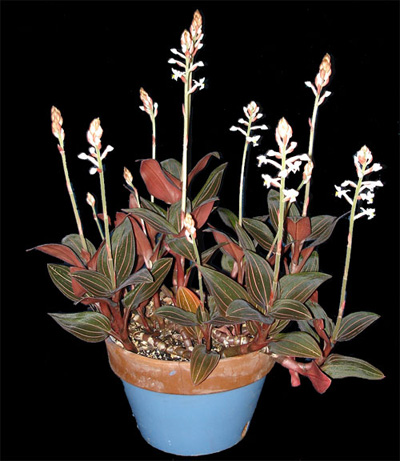
This clinic is an example of the repotting process for a terrestrial orchid. We have a ludisia discolor that has just finished blooming and is ready for repotting. This plant blooms in the winter and by March it is ready to be repotted.
In January of 2006 our Ludisia bloomed in a 5" pot as shown in this picture to the right. This little plant was acquired a year before as a tiny little thing from a local nursery. It was on the "out of bloom" table and had only a few shoots. Ludisia Discolor has very pretty foliage and makes a great houseplant whether it blooms or not. The blooms are tall with small flowers and while they are very pretty, the plant itself is pretty year-round making it an ideal houseplant. Ludisia grows quite quickly and will become a large specimin plant within a few years given good growing conditions.
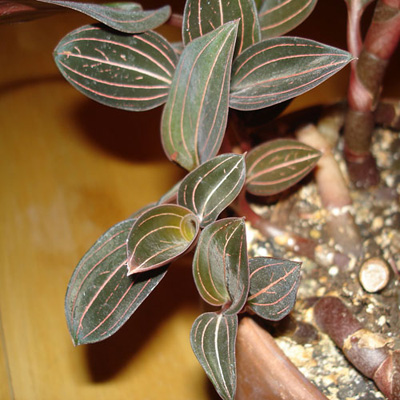
We can see that the rhizome grows along the top of the mix and from it come new shoots. We can see that the new shoots are straining against the side of the pot and so this plant will need to be repotted after its bloom.
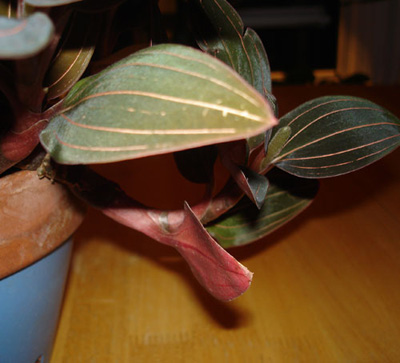
On the other side of the pot the new growth has now gone over the edge of the pot. The Ludisia orchid will form new roots along its rhizome and this shoot would be growing roots along its base had it stayed in the pot. If a Ludisia becomes too leggy we can cut off the new shoots such as this one and simply stick them in the potting mix and they will root. This is different than most other orchids.
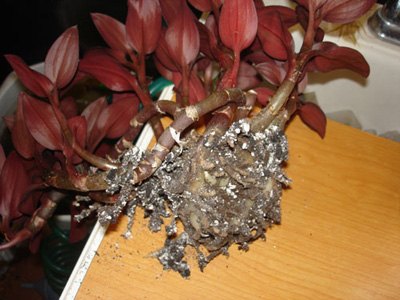
We take the plant out of its pot and get a good look at its roots. The roots are fleshy and like to stay near the top of the pot. The leaf mass is substantially larger than the roots. Because Ludisia will root along its rhizome and does not have a very deep root mass we are going to put it in a wide shallow pot. While most orchids love to be tight in a pot, Ludisia doesn't much care. To remove the old mix we will rinse the root mass with water until we are left with just roots.
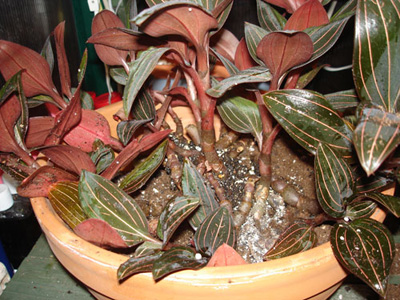
Our goal is to get as much of the rhizome in a position where it can be in contact with the mix and begin rooting and sending up new shoots. As a result we are going to move this plant from a 5 inch standard pot up to a 10 inch bulb pan. We have chosen the bulb pan because it is very shallow and wide. With other orchids we would not move a plant up 5 inches in pot size but with Ludisia this is fine, it will encourage roots along the rhizome.
We have filled the bottom of the pot with Terrestrial Orchid Classic Orchid Mix and then we set the root mass upon it.
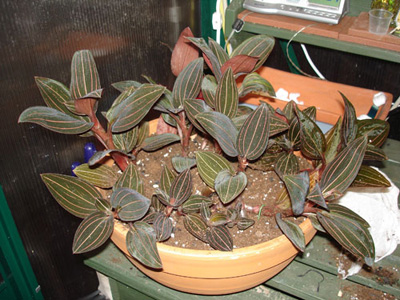
After filling in around the root mass we deliberately try to bring the mix up in contact with the rhizome. In the picture to the right you can see that we have bent some green wire into a U shape and used it to secure the rhizome to the potting mix.
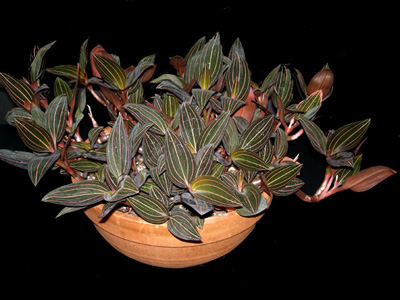
The picture to the right was taken in October of 2007, a year and a half from the repotting. The plant has filled out the space nicely and we are anticipating a wonderful bloom in a few months.


